Sausage and Veggie Sheet Pan Dinner

I keep a variety of things in the freezer and fridge for emergency meals. That can be when we are completely out of fresh produce or I forgot to thaw out meat, but I always have something on hand to throw together a healthy, balanced dinner when I don’t feel like cooking.

Insert sheet pan dinners.

I try to always keep some kind of sausage in the fridge. Usually, it is an apple chicken sausage I get from Walmart, but lately I’ve been getting an apple gouda sausage from Natural Grocers. Both are delicious and serve the purpose I need, which is get dinner ready quickly.

The reason I love sheet pan dinners is because you can use whatever you have in the fridge, and it always turns out delicious.

Sheet pan of roasted asparagus, delicate squash, onion and sausage fresh out of the oven

I encourage you to make one for yourself. Experiment with different veggies and spices. This one was fairly simple, but I did have one secret ingredient that I can guarantee you will make your sheet pan dinner a success.

What you need:

  • 2 sausages (your favorite brand and flavor), sliced into rounds
  • 1 bunch of asparagus, ends trimmed
  • 1 onion, diced into large chunks
  • 1 delicata squash, seeds removed and chopped
  • A drizzle of avocado oil
  • Seasoning of choice: I used salt, pepper and garlic powder in this one
  • Secret ingredient: 6 small dollops of bacon grease scattered around the pan

Pre-heat the oven to 400 degrees. Prep the veggies and sausage, and place on a parchment lined baking dish. Drizzle with oil and seasonings. Go easy on the salt since the bacon grease will add a nice amount of saltiness.

Bake for 12 minutes and stir around. Bake for 12 more minutes.

Roasted sausage, asparagus, delicata squash and onion with kraut and Dijon mustard on a blue plate

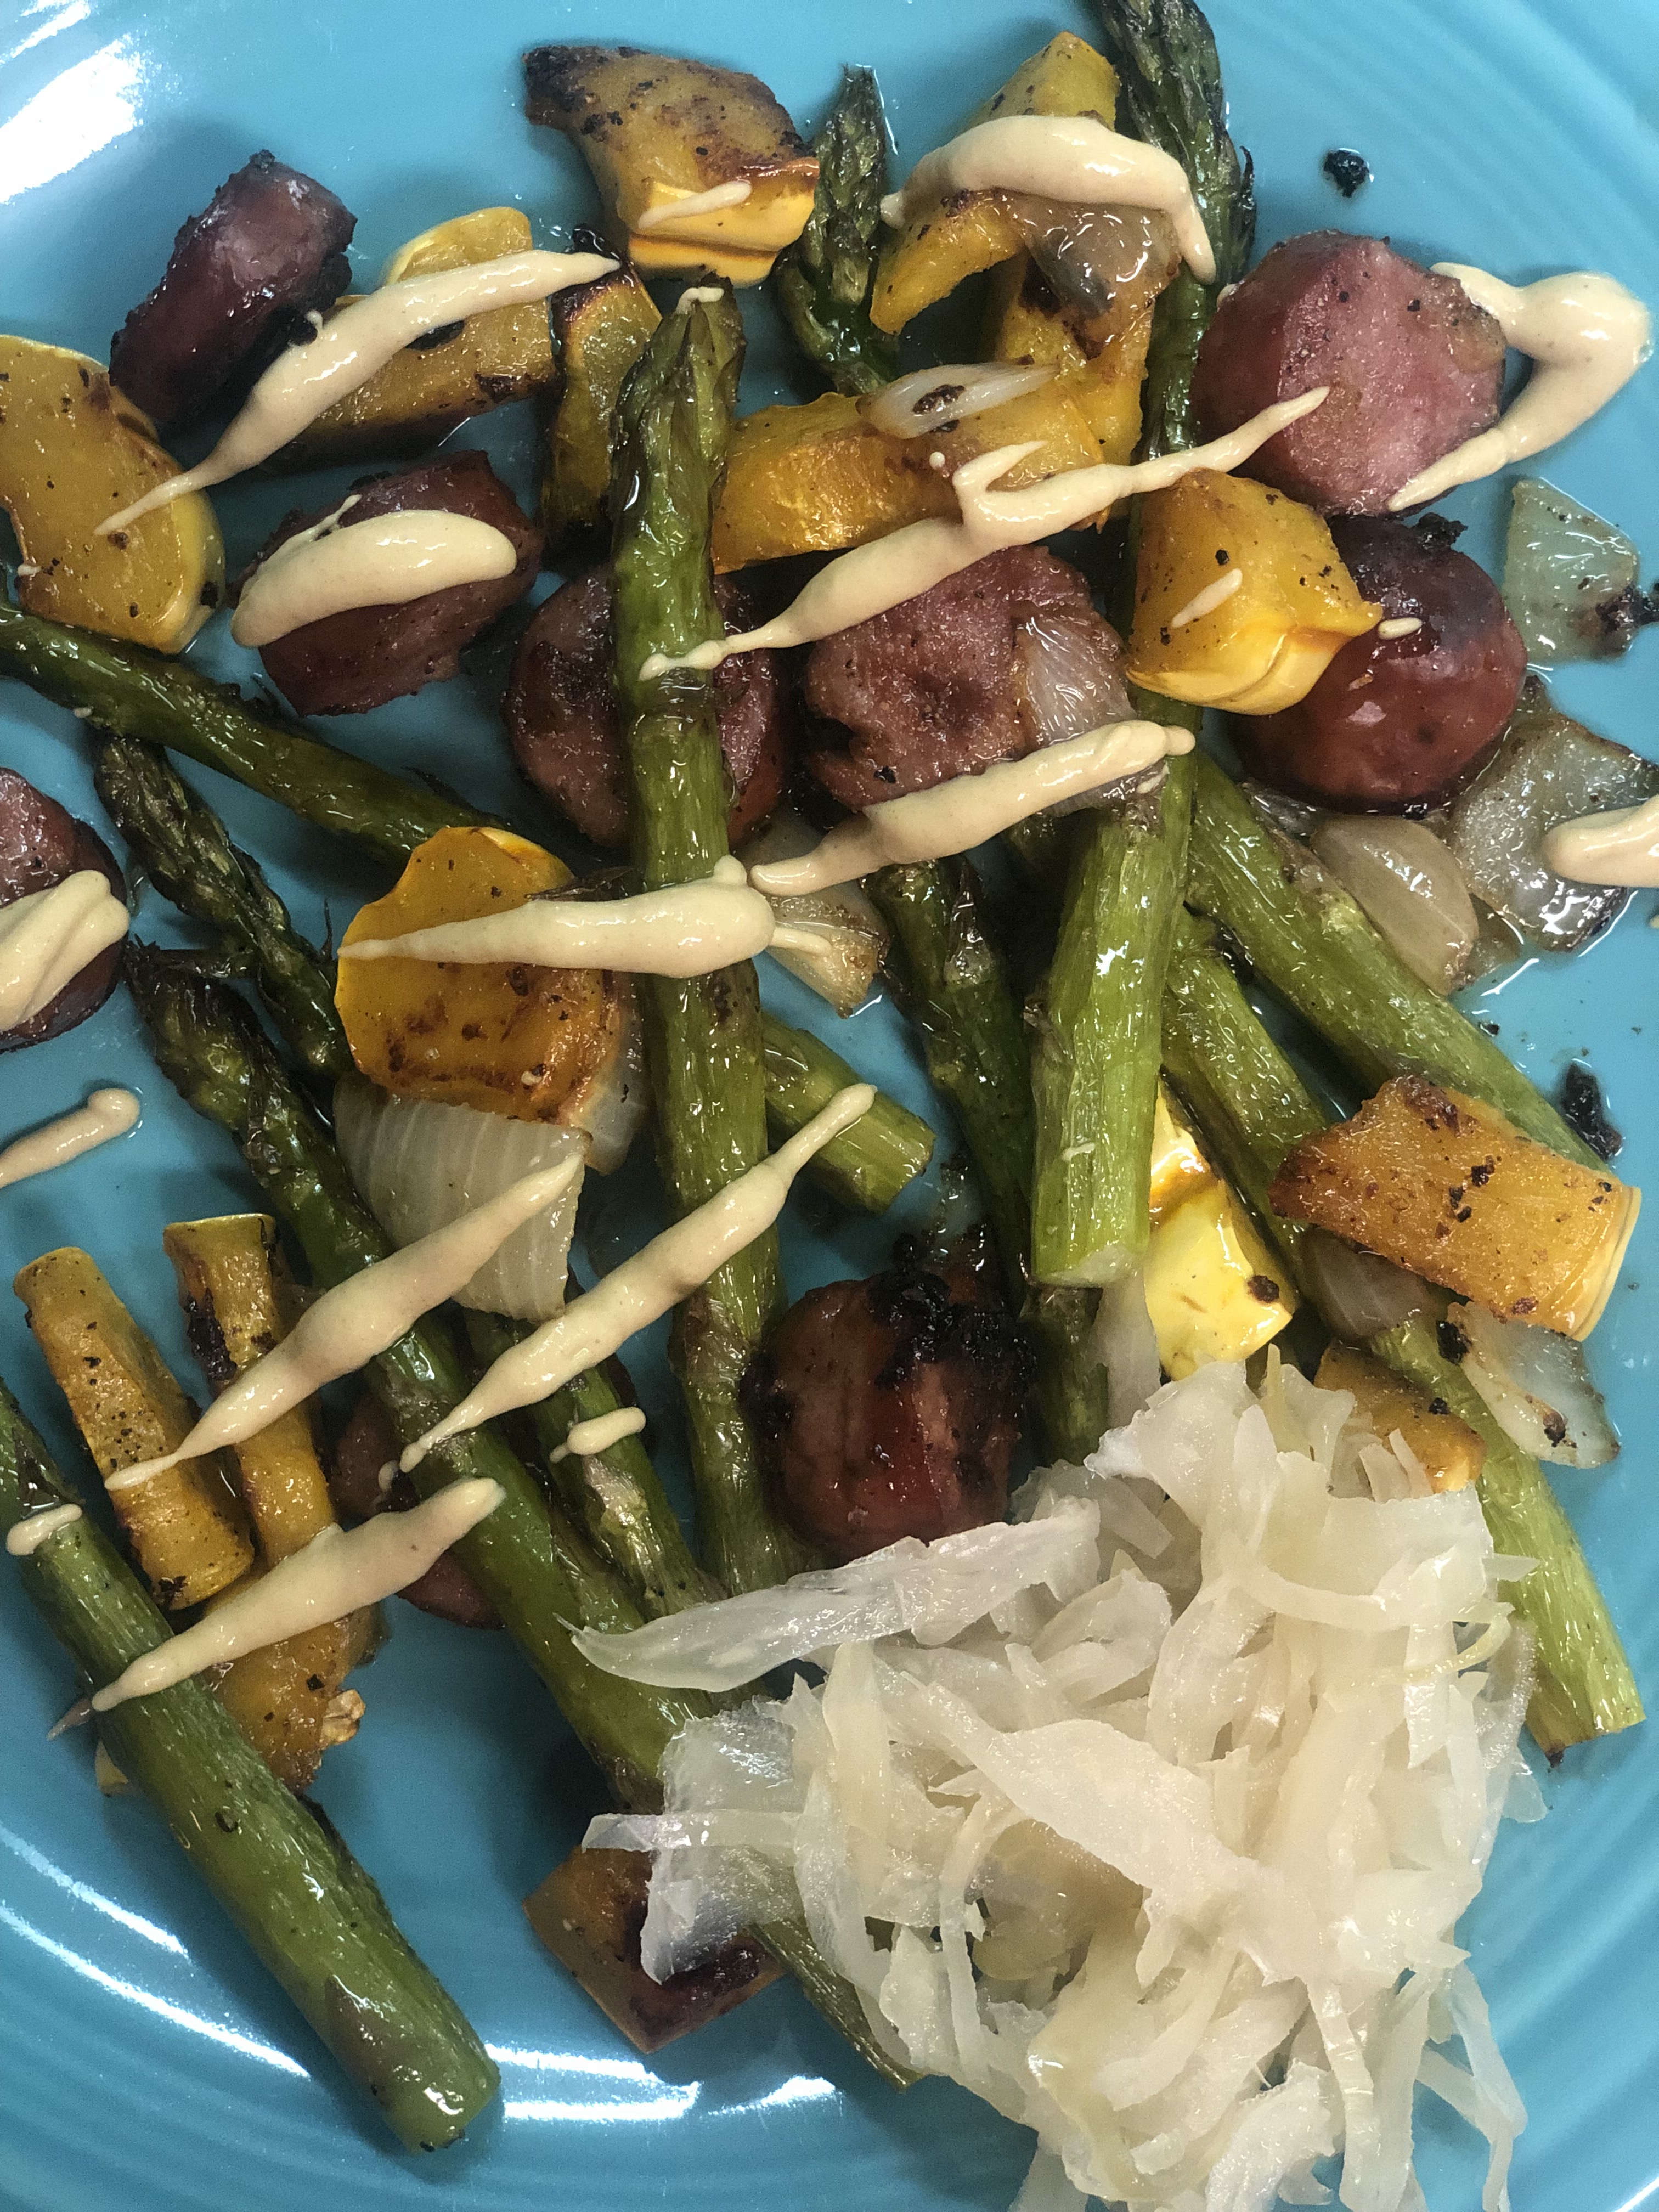
Serve hot with a side of Bubbie’s Kraut and your favorite mustard. We used Dijon, but also like spicy brown mustard.

The beautiful thing about sheet pan dinners is the ability to use whatever you have on hand. I make these at least once a week, but it is hardly ever the same one twice. Get creative and enjoy yourself. It’s so easy and turns out perfect every time.

cheesy keto cauliflower soup

Cheesy Keto Cauliflower Soup

I’ve got a bad case of the winter blues. I’ve done a lot of traveling over the last week, and my schedule is just now getting back to normal.

I went to Walmart on my lunch break yesterday to pick up some staple items to get us through to the weekend. I always find it challenging to find good organic produce and pantry items at my rural Walmart, but yesterday I was able to find a handful of things to whip up a new spinoff of my mom’s famous Cheesy Potato Soup.

Organic produce and items from Walmart

I have been craving comfort food. Everything cheesy and warm since the weather has been so rainy and cold lately. I decided to make a keto version of Cheesy Potato Soup. Instead of using potato, I decided on cauliflower because it has a lower carbohydrate count and still has the chunky consistency of potato.

What you need:

  • 2 Tablespoons grass-fed butter
  • 1 head of organic cauliflower, chopped
  • 1 organic onion, diced
  • 2 organic carrots, diced
  • 3 stalks of organic celery, diced
  • 2 cups chicken bone broth
  • 1/2 block organic cream cheese, cubed
  • 2 cups organic cheddar cheese, grated
  • 1/4 cup organic heavy cream
  • 1/2 teaspoon dried thyme
  • Salt, pepper and garlic powder, to taste
  • Grated cheddar cheese, for garnish (optional)
  • Sour cream, for garnish (optional)
cheesy keto cauliflower soup

Prep your veggies by chopping up the cauliflower and dicing the onion, carrot and celery into similar size pieces. Pre-heat a pot on medium-high heat. Add the butter and melt.

Add the onion, celery and carrot. Season with salt and pepper Cook until onions are translucent, or about 5-7 minutes. Add the cauliflower, chicken bone broth and thyme. Bring to a boil. Reduce to a simmer and cook for 15-20 minutes, or until the veggies are tender.

Add in the cream cheese and stir until melted throughout. Add in the heavy cream and cheddar cheese. Check for seasoning, and add salt, pepper and garlic powder until you get it right for your tastebuds.

Top with grated cheddar cheese and sour cream, if you like.

Enjoy.

Chicken Enchiladas

Mexican food is my jam. I’m sure I could live off of it, if I had to choose just one thing to eat for the rest of my life.

Over the weekend, I shared what I bought at the grocery store. Now, I want to share how I’ve been using some of those items so you can get some ideas on how cooking can be fun and full of flavor.

Added bonus…it’s all good for you.

These enchiladas were no joke. We ate the whole pan. But don’t judge. It was a brownie sized pan.

What you need:

  • 2 chicken breasts
  • 1 jar of your favorite salsa
  • 1 bag of Horizon Organic Mexican Cheese blend
  • 1 pack of Siete Foods Almond Flour tortillas
  • 5 green onions, sliced
  • Fennel and Fire Fajita Seasoning, to taste

First, you want to throw the chicken breasts in the Instapot with 3/4 cup of water and some fajita seasoning. Set to 10 minutes on manual, and let the pot do all the work for you. Once it is ready, quick-release the pressure and shred the chicken. I shred chicken with a hand mixer. It’s so easy and mess free.

Now you assemble the casserole. Salsa, chicken, green onion and seasoning on the bottom. Add a layer of tortillas. Then continue layering chicken, cheese, seasoning, onions, salsa, tortillas until you run out of chicken. Top with the final layer of tortillas, cheese and salsa.

Bake covered with foil in a 350 degree oven for 20 minutes. Remove move foil and back for an additional 10 minutes. Serve with sour cream and guacamole.

It was absolutely delicious. I usually try to make enough for leftovers, but this little guy didn’t make it. We ate the whole thing. If you are cooking for more than two people, just double the ingredients and use a 9×13 pan. You may have to bake it for a longer time period, but the outcome should be just as good.

Enjoy this one. We sure did.

Spaghetti Squash Spaghetti

This is one Paleo dinner that doesn’t taste “granola” at all. It was so good we ate until our stomachs hurt.

The glorious part is I browned the hamburger meat several hours before I was ready to eat, and I threw all the ingredients for the sauce into the crockpot to cook for awhile so the flavors could get right. Plus, slow cooking the meat makes it extra tender.

I’ll admit it’s not the prettiest dish I’ve ever made, but it makes up for it in warm, hearty flavors. Perfect for fall.

What you need:

  • 1 spaghetti squash, cut in half
  • 1 jar of Whole30 compliant spaghetti sauce
  • 1 lb. ground beef
  • 1 onion, roughly chopped
  • Salt, pepper, garlic powder and Italian Seasoning to taste

Sauté the ground beef with the onion in a hot skillet until meat is cooked through, about 10 minutes. Season with salt, pepper and garlic powder. Move to slow cooker. Add in the sauce. (I used Thrive Market’s Roasted Garlic Tomato Sauce.) Add a little Italian Seasoning, and more salt and pepper if you like. I cooked ours on low for about 4 hours, but you could also make this on the stovetop.

Preheat the oven to 400 degrees. Cut the spaghetti squash in half lengthwise. Scrap out the pulp and seeds. Season the inside of the squash halves with salt, pepper and a little avocado oil. Place on a parchment lined baking sheet cut side down, and roast for 40-45 minutes. When it is done, remove from the oven, and let cool for a few minutes. Flip the halves over and scrap the squash with a fork to make “noodles.”

Put the squash noodles in a bowl. Top with the spaghetti sauce. And enjoy.

It was warm and comforting. And like I said, we ate all of it. The good thing is the “noodles” didn’t make us sick. It’s the little things in life.

What are your favorite comfort dishes that just happen to be Paleo?

Secret Ingredient Salmon Cakes

Someone I admire paid me the biggest compliment today.

On the Adventures to Wellness Facebook page, there was a lovely little comment on my Creamy Chicken and Zoodles post about finding a yummy gluten free, egg free, nut free, soy free recipe.

I love it when you guys comment and leave messages about making my recipes. So humbling.

These Salmon Cakes are extra tasty. And in keeping with the gluten free, egg free, nut free, soy free theme, I can’t wait to share it with you.

What’s the secret ingredient?

Pumpkin purée.

Pum

What you need:

  • Two cans pink salmon
  • 1/2 can organic pumpkin purée
  • 2 tablespoons coconut flour
  • Dill, garlic powder, salt and pepper to taste

Preheat the oven to 400 degrees.

Drain the juice off the salmon, and put meat into a bowl. Flake with a fork. Stir in the pumpkin and coconut flour. Season liberally with salt, pepper, garlic powder and dill.

Bake for 20 minutes until golden brown. Enjoy.

It’s just that simple. The pumpkin purée acts as a binder like eggs, and it doesn’t alter the flavor of the cake. And if you have an allergy to eggs, you don’t have to worry over it with this dish.

I paired our Salmon Cakes with a combination of wilted turnip greens and Swiss chard. So tasty and full of Vitamin K.

What is one ingredient you use in everything?